Overview: Creating, Editing and Publishing Web Experiences
Brightcove Engage™ allows you to create engaging video experiences without the need for any technical resources. Web experiences follow responsive design principles so they look great on desktop, tablets and mobile devices.
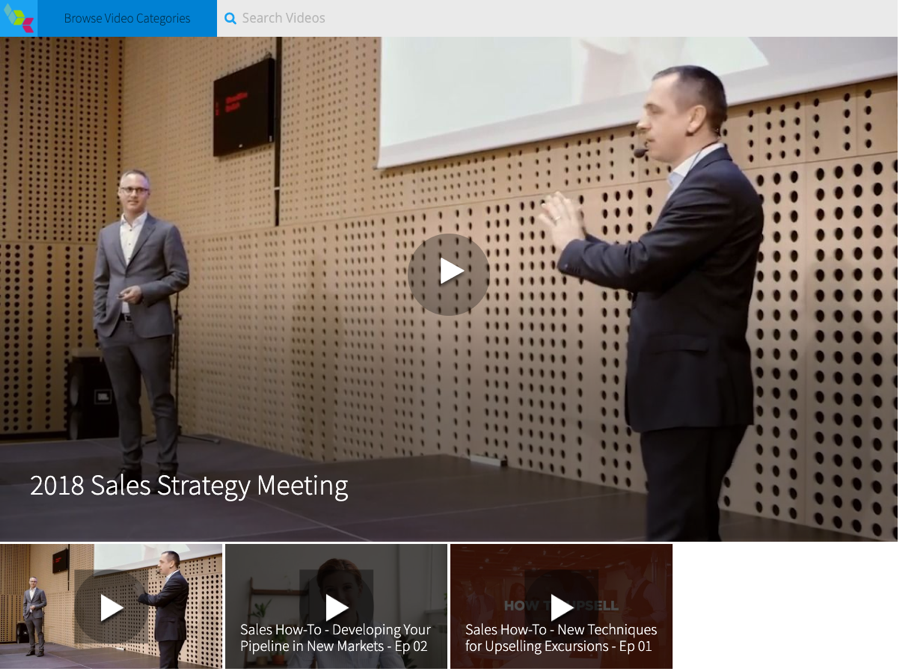
The following is an example of a Web experience that was built using the Brightcove Engage web template.

For a step-by-step guide to building a Web Experience, check out Step-by-Step: Creating and Publishing a Web Experience.
The main steps to create and publish a Web Experience are:
Choosing a template
When you create a new experience, you start by choosing a template. The template controls the overall look and feel of the experience. Brightcove Engage provides a set of templates that give you the flexibility to deliver the type of video experience needed to engage with your viewers. To learn more about templates and view some sample sites, see the Overview of Experience Templates topic.
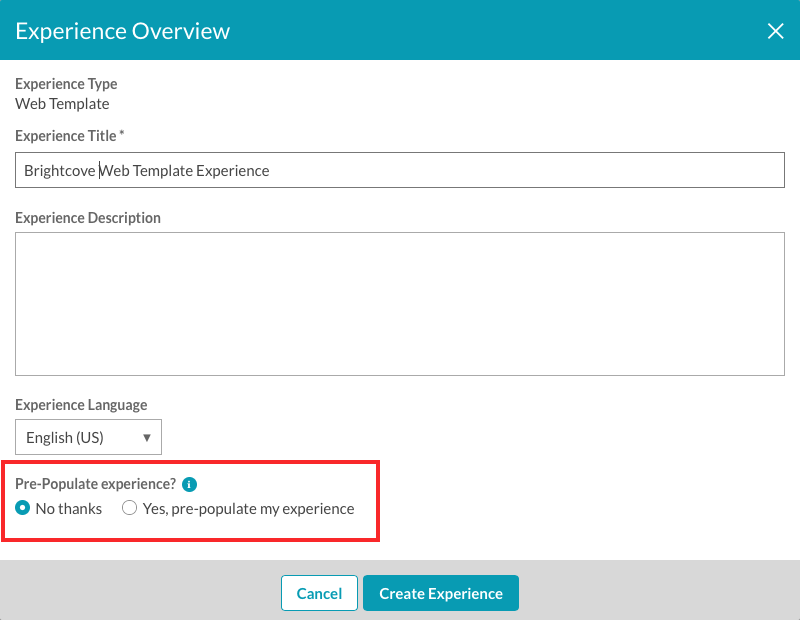
After choosing a template, you have the option to Pre-Populate the experience with sample content. Clicking Yes, pre-populate my experience will pre-populate the experience with videos from your account. This makes it easier to see what the experience will look like as you begin the customization process.

Adding video and customizing the experience
After you create an experience, the Experience Editor is used to customize the experience. The following types of customizations can be done:
- Pages - Images, text and links can be added to page templates to brand the experience as needed. To learn more about adding objects to pages, see Customizing the Content of Web Experience Pages.
- Videos - Collections are created to select and organize video content. To learn more about adding video content to the site, see Adding Videos to an Experience.
- Style - The look of the experience can be customized by selecting a new theme or by changing the site colors and fonts. To learn more about customizing the style, see Customizing the Style of a Web Experience.
- Access Control - Restrict access to the site. To learn more about site configuration, see Controlling Access to an Experience.
- Overview - Edit the name, description and language for the experience. To learn more about editing the site overview, see Editing Experience Details.
Previewing and publishing the experience
Previewing an experience lets you see how the experience is going to display on mobile, tablet and desktop devices. Experiences can be previewed in a new browser tab or a shareable link can be generated so others can preview the site. Publishing the experience generates a static URL for the site and makes it accessible to viewers. To learn more about previewing and publishing a Web Experience, see Previewing and Publishing a Web Experience.

