


Creating Access Control Profiles
By default, when a Brightcove Engage™ experience is published, the experiences are public:
- Mobile Apps - Anyone with the Access Key and can access the app
- Web Applications - Anyone with the site URL will be able to access the web portal
Access Control Profiles can be created so that users will be forced to authenticate with valid credentials before they can access the app/site. Brightcove Engage supports the Security Assertion Markup Language 2.0 (SAML 2.0) standard for exchanging authentication and authorization data between security domains.
Brightcove Engage supports most major Identity Providers, including:
- Ping
- OneLogin
- Auth0
- ADFS 2.0 / 3.0
- Google G Suite
- Shibboleth
- Okta
- Salesforce.com
Other providers using the SAML 2.0 standard will also work.
When configuring your SSO software, map the following attributes:
- firstName maps to First Name
- lastName maps to Last Name
- email Maps to Email
A sample mapping is shown below:
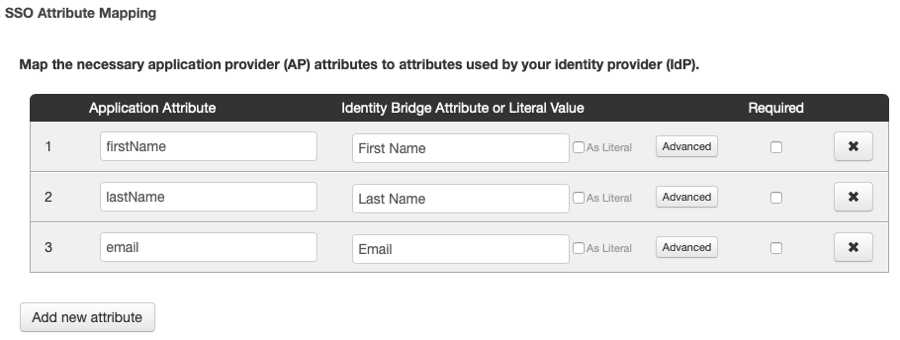
By exposing these values, the user's name and email will appear on the mobile app Profile page and will also appear as part of the video analytics inside the Brightcove Engage application.
Creating a new profile
Access Control Profiles are created as part of the Project settings and then assigned to experiences.
To create an Access Control Profile, follow these steps:
- Log in to Brightcove Engage.
- From the Projects page, click Settings.
- In the left navigation click Access Control Profiles. The Access Control Profiles page will display with a list of profiles (if any) that have been created.
- Click Create Profile.
- Give the profile a Name.
- (Optional) Configure a Session Timeout. This is the amout of time a user can be logged into an app before they are required to re-authenticate. A few notes:
- Your SSO provider must be set to either force re-authentication or to have a session timeout of less than this timeout. If it's not, we'll redirect to your SSO provider after our timeout and they will immediately issue a response that the user is logged in.
- Select the SSO option. The SSO configuration options will display.
- If you have an export file of your SAML 2.0 metadata, click Select File and then browse and select the metadata file. This will prefill the SAML 2.0 Endpoint and the X.509 Certificate fields.
- Enter a value for the SAML 2.0 Endpoint (HTTP). This value should be available from your SAML provider.
- Enter a value for the X.509 Certificate. This value should be available from your SAML provider.
- (Optional) Enter the SAML Issuer / Entity ID Override. Enter a value here to optionally override the SAML issuer.
- (Optional) Enter the ACS URL Override. Enter a value here to optionally override the ACS URL.
- (Optional) Enter the SAML AuthnContext Override. Enter a value here to optionally override the SAML AuthnContext.
- (Optional) Enter any SAML attributes for that you want passed to your external JavaScript.
- (Optional) Check Expose all attributes to expose all of the SAML attributes for use in external JavaScript.
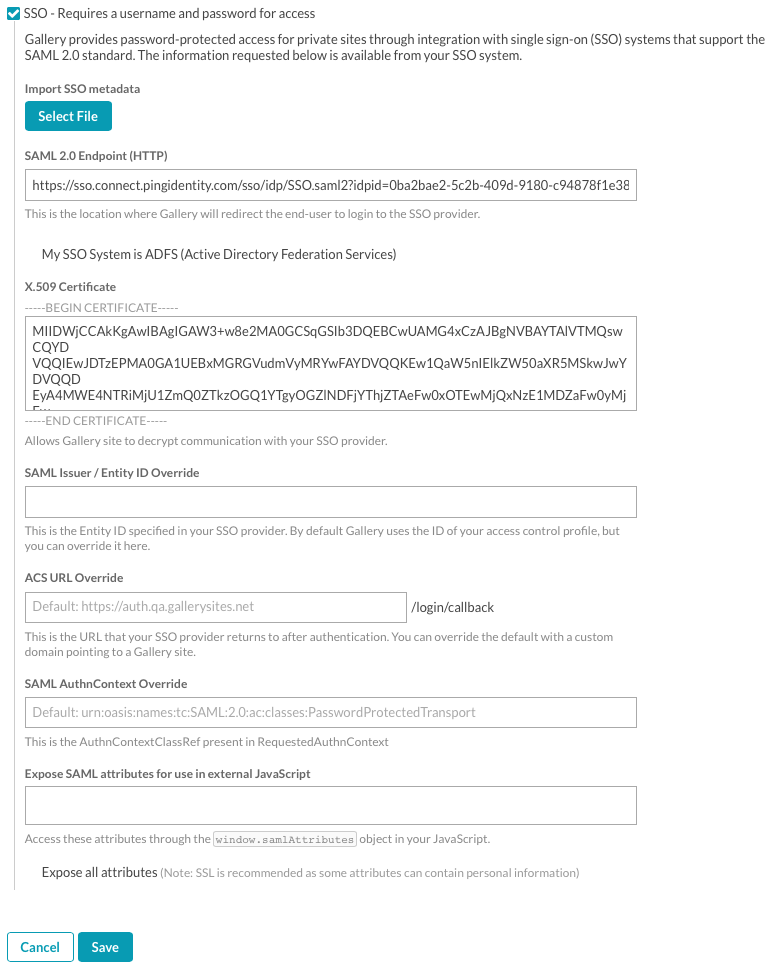
- Click Save.
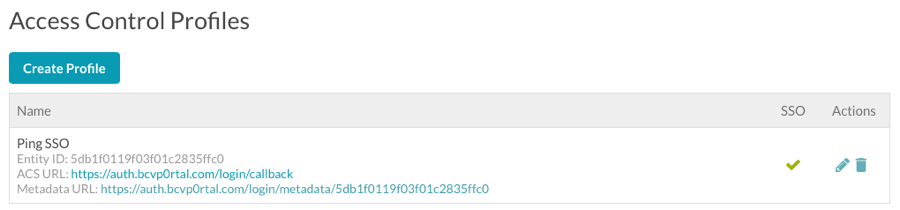
- Verify the profile you created appears in the list of Access Control Profiles.

To edit or delete an Access Control Profile, click the edit (![]() ) or delete (
) or delete (![]() ) icon associated with the profile. Once Access Control Profiles have been created, they can be assigned to a site as part of the site properties. For information, see Controlling Access to an Experience.
) icon associated with the profile. Once Access Control Profiles have been created, they can be assigned to a site as part of the site properties. For information, see Controlling Access to an Experience.
Configuring the ACS URL
Your SSO provider will require an Assertion Consumer Service URL (ACS URL). The ACS URL is listed in the SSO section of the Access Control Profiles table.
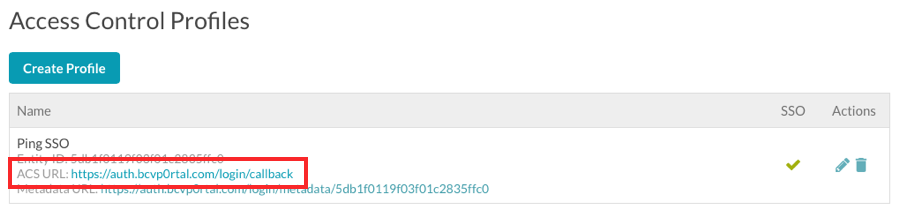
The ACS URL defaults to https://auth.bcvp0rtal.com/login/callback. You can also override the ACS URL by providing your own URL. Both of these options can be used for configuring stricter SSO providers.