


Securing Experiences Using PingOne
When an experience is secured using SSO, users will be required to authenticate before they can access a Web or Mobile App Experience.
The steps in this topic assumed you have created a PingOne trial account and have confirmed your account through email.
Creating an identity repository
Start by creating an identity repository.
- Log in to your PingOne account. The Dashboard page will appear.
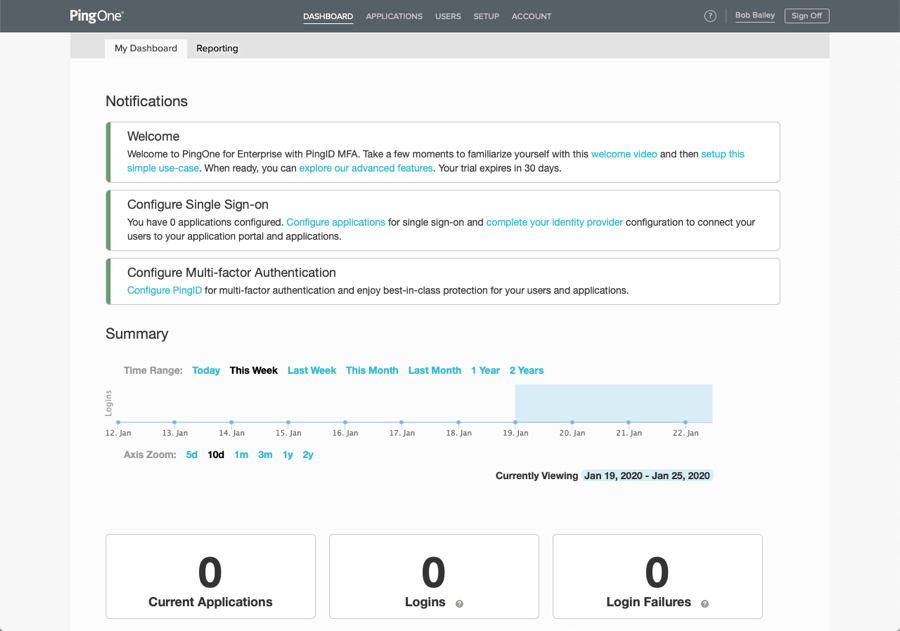
- Click SETUP in the header. The Settings page will open.
- Click Connect to an Identity Repository.
- Click on PINGONE DIRECTORY and then click Next.
- Confirm that the directory has been configured.
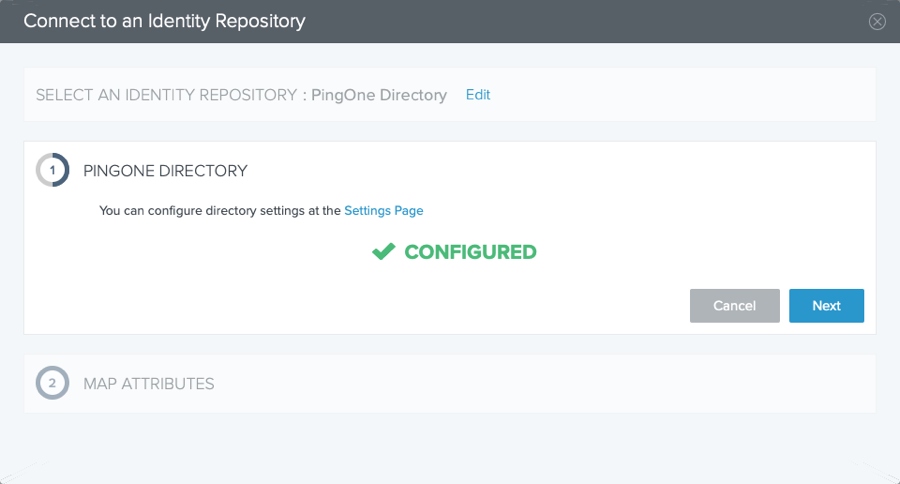
- Click Next.
- For the MAP ATTRIBUTES section, keep the default values and click Finished.
Creating an application
Next we'll create an application that will be secured using SSO.
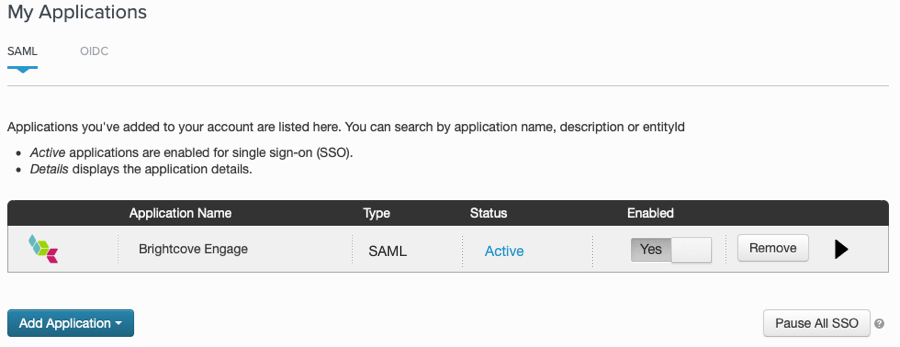
- Click APPLICATIONS in the header. The My Applications page will open.
- Click Add Application.
- Select New SAML Application.
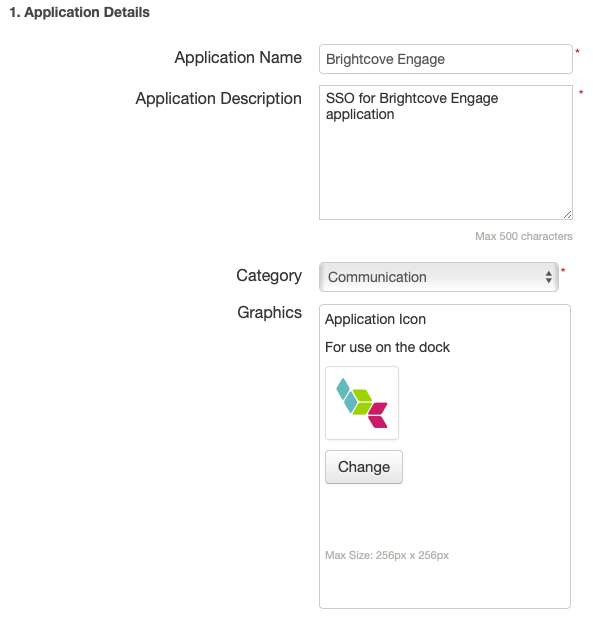
- Enter an Application Name and Application Description.
- Select a Category (recommend Communication).
- (Optional) Click Change and browse and select an icon for the application.
- Click Continue to Next Step.
- On the Application Configuration page, locate the SAML Metadata field.
- Click the Download link.
Creating an Access Control Profile
You need to create an Access Control Profile that will be used to secure any experiences you want to secure using SSO.
- Log in to your Brightcove Engage account.
- Click Settings in the header.
- In the left navigation, click Access Control Profiles.
- Click Create Profile.
- Give the profile a Name.

- Locate the Import SSO metadata section and then click Select File.
- Browse and select the SAML metadata file you downloaded from PingOne (in the previous section).
- Confirm that values for the SAML 2.0 Endpoint and X.509 Certificate have been filled in.
- Click Save and confirm that the profile was created.
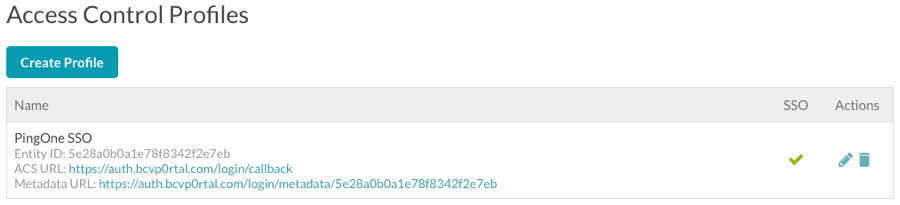
- Click on the Metadata URL field and save the XML file.
The XML file will be needed to complete the application configuration in PingOne.
Completing the application configuration
- Return to the PingOne application.
- On the Application Configuration section, locate the Upload Metadata field.
- Click Select File and browse and select the file you downloaded after creating the Access Control Profile in Brightcove Engage.
- Confirm the Assertion Consumer Service (ACS) and Entity ID fields were filled in with values after the import.
- Click Continue to Next Step.
- On the SSO Attribute Mapping section, add the following attributes:
Application Attribute Literal Value firstName First Name lastName Last Name email Email 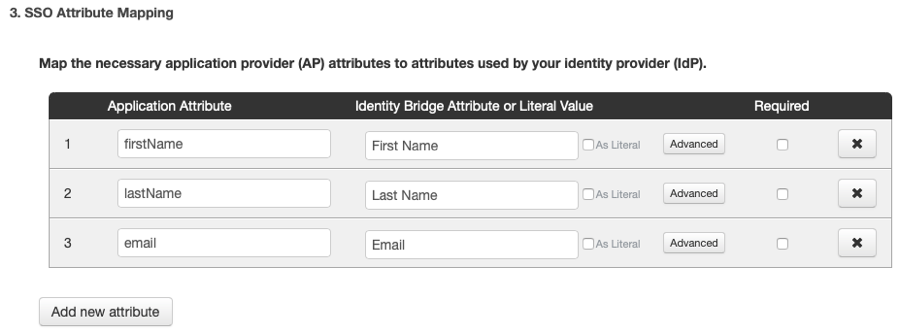
- Click Continue to Next Step.
- On the Group Access page, locate the Users@directory group and then click Add.

- Click Continue to Next Step.
- Click Finish.
- Confirm that the application is Active and Enabled.
Mapping the application attributes will cause the following to happen in Brightcove Engage Experiences:
- For Mobile App Experiences, the user's name and email address will appear on the Profile page
- For all experiences, the user's email address will appear as part of video analytics
Assign the Access Control Profile to an experience
The last step is to assign the Access Control Profile that was created to the experience(s) you want to secure.
- Return to Brightcove Engage.
- Edit the experience you want to secure.
- In the left navigation, click SITE CONFIGURATION > Access Control.
- Select the Access Control Profile that is associated with the PingOne SSO configuration.
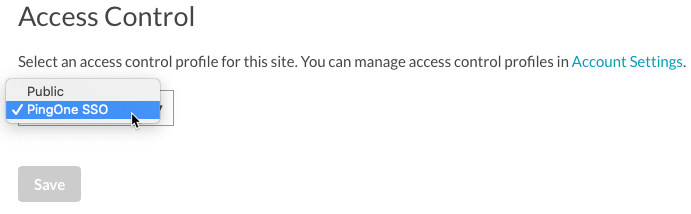
- Click Save.
- Publish the experience.
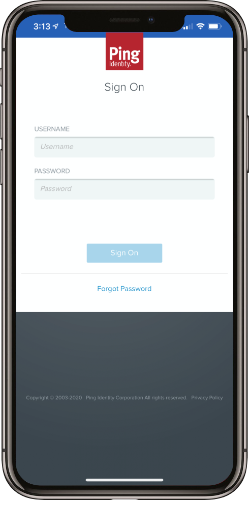
When you access the experience, you should be prompted by PingOne to login. The following image is when trying to access a Mobile App Experience.