


Using the Experience Editor to Customize a Web Experience
The Experience Editor is used to customize the look and feel of experiences built using Brightcove Engage™. Click on the experience title to open the Experience Editor. With Web Experiences, the Experience Editor provides the ability to:
- Add objects to pages
- Add videos to a site
- Customize the site style
- Control access to the site
- Configure the site details
These options are accessed by clicking the menus in the left navigation.
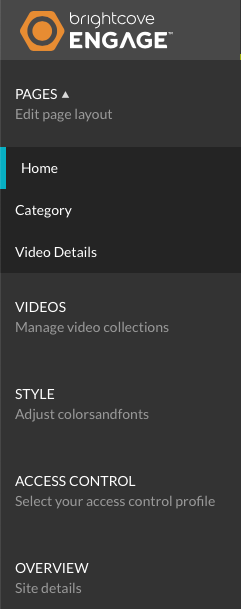
Adding objects to a page
Objects such as text, images and URLs can be added to pages allowing you to customize and brand your Web Experience. To learn how to add objects to pages, see Adding Images, Text and Links to Web Experience Pages.
Adding videos to a Web Experience
To add videos to an experience, click VIDEOS in the left navigation. For details on how to add videos to a Web Experience, see Adding Videos to an Experience.
Customizing the style
To customize the colors and fonts used on a Web Experience, or to select another theme, click STYLE in the left navigation. For details on how to customize the style, see Customizing the Style of a Web Experience.
Controlling access to the site
The Access Control settings are used to restrict access to the site. To configure the Access Control settings, click ACCESS CONTROL in the left navigation.
For details on the access control settings, see Controlling Access to an Experience.
Configuring the experience details
The Overview settings provide the ability to edit the name, description and language for the experience. To configure the experience details, click OVERVIEW in the left navigation.
For details on configuring the site details, see Editing Experience Details.